Introduction
In this tutorial I will be covering the configuration of JRebel with Hybris. With JRebel configured you will be able to modify java source classes and compile them on the fly.
“No need to build and start the server again and again”
The configuration is very simple, just 3 steps and you are good to go!
Step 1
- Download JRebel: Archive can be downloaded from the below link http://zeroturnaround.com/software/jrebel/download/prev-releases/
- Extract the zip file at a location of your preference, for eg: C:/jrebel

- Active JRebel:
– Go inside bin folder of JRebel.
– Start the activation utility by running “activate-gui.cmd” file.
– It will open a Jrebel activation window. The window will contain 2 tabs:
Try JRebel for free and I already have a license.Choose Try JRebel for FREE and fill the basic information.
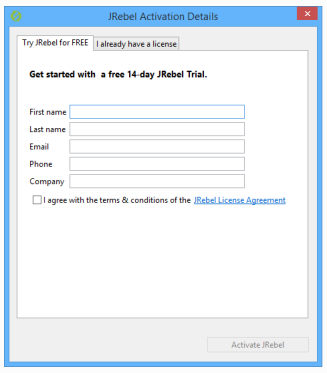
OR
Buy a license and fill the information in the I already have a license section.
Step 2
- Add the below given property in local.properties file
tomcat.javaoptions=-agentpath:C:/jrebel/lib/jrebel64.dll
** change the version of the jrebel[XX].dll according to the machine specifications.
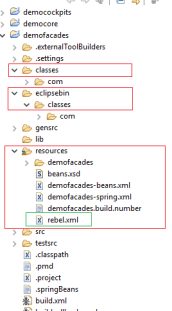
Creation of rebel.xml file:
– You will be required to add the rebel.xml file in the resource folder of each extension.

– Create a new rebel.xml class and copy/paste the below given content into the file:
<?xml version=”1.0″ encoding=”UTF-8″?>
<application xmlns:xsi=”http://www.w3.org/2001/XMLSchema-instance” xmlns=”http://www.zeroturnaround.com” xsi:schemaLocation=”http://www.zeroturnaround.com http://update.zeroturnaround.com/jrebel/rebel-2_1.xsd”>
<classpath>
<!– Make sure to replace Absolute_Path with your concrete values –>
<dir name=”{Absolute_Path}/classes”/>
</classpath>
</application>
** The absolute path should be the complete path to the classes folder.
Example: C:/hybris/bin/custom/demo/demofacades/classes
***The classes folder is the compiled source folder of Hybris and not IDE’s(eclipse).
Step 3
- Change the IDE(eclipse) compile output path in “.classpath” file of the extension.
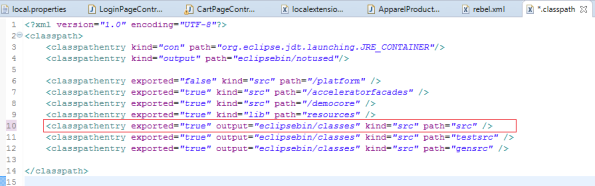
TO
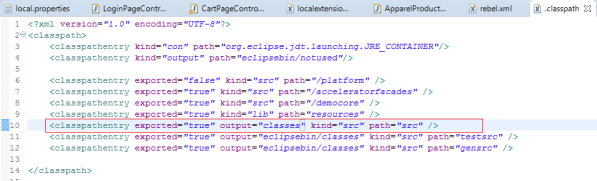
Path structure:
All the configurations are completed.You just need to recompile the code from IDE(eclipse) after making the changes in the Java source file.For Eclipse you need to do the below mentioned step:- Just go to Project -> Clean
- Select “Clean projects selected below” option and select the extensions which contains the modified java source classes.
- Select “Start build immediately”.
- Select “Build only the selected projects”.
- Press OK and you are done!
